Painting landscapes in the evening light, capturing the fading colour of the land as the sky lights up with colour, is not easy. So often we see blackened landscapes with garish skies. Lana Ballot knows what she’s doing and so I’m delighted that she’s agreed to guest post and tell you all about how she does it.
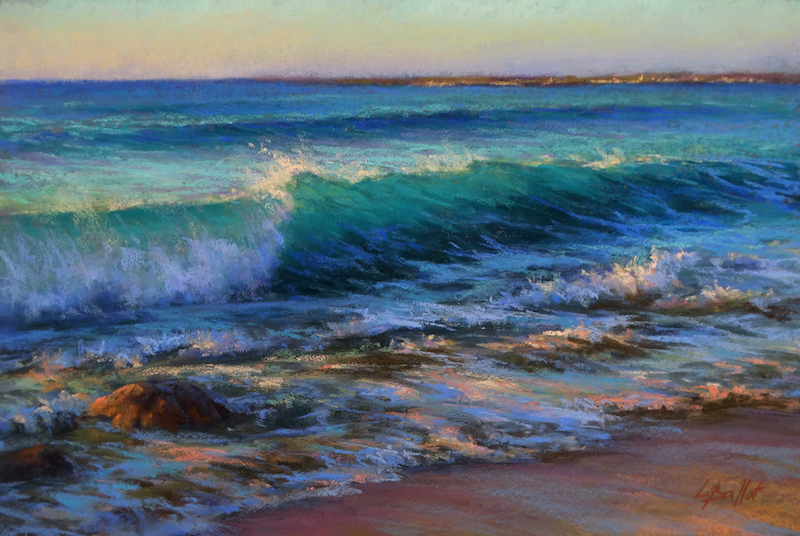
In case you aren’t familiar with her work, here’s a teaser!

Before I hand the blog over to Lana, first a wee something about her.
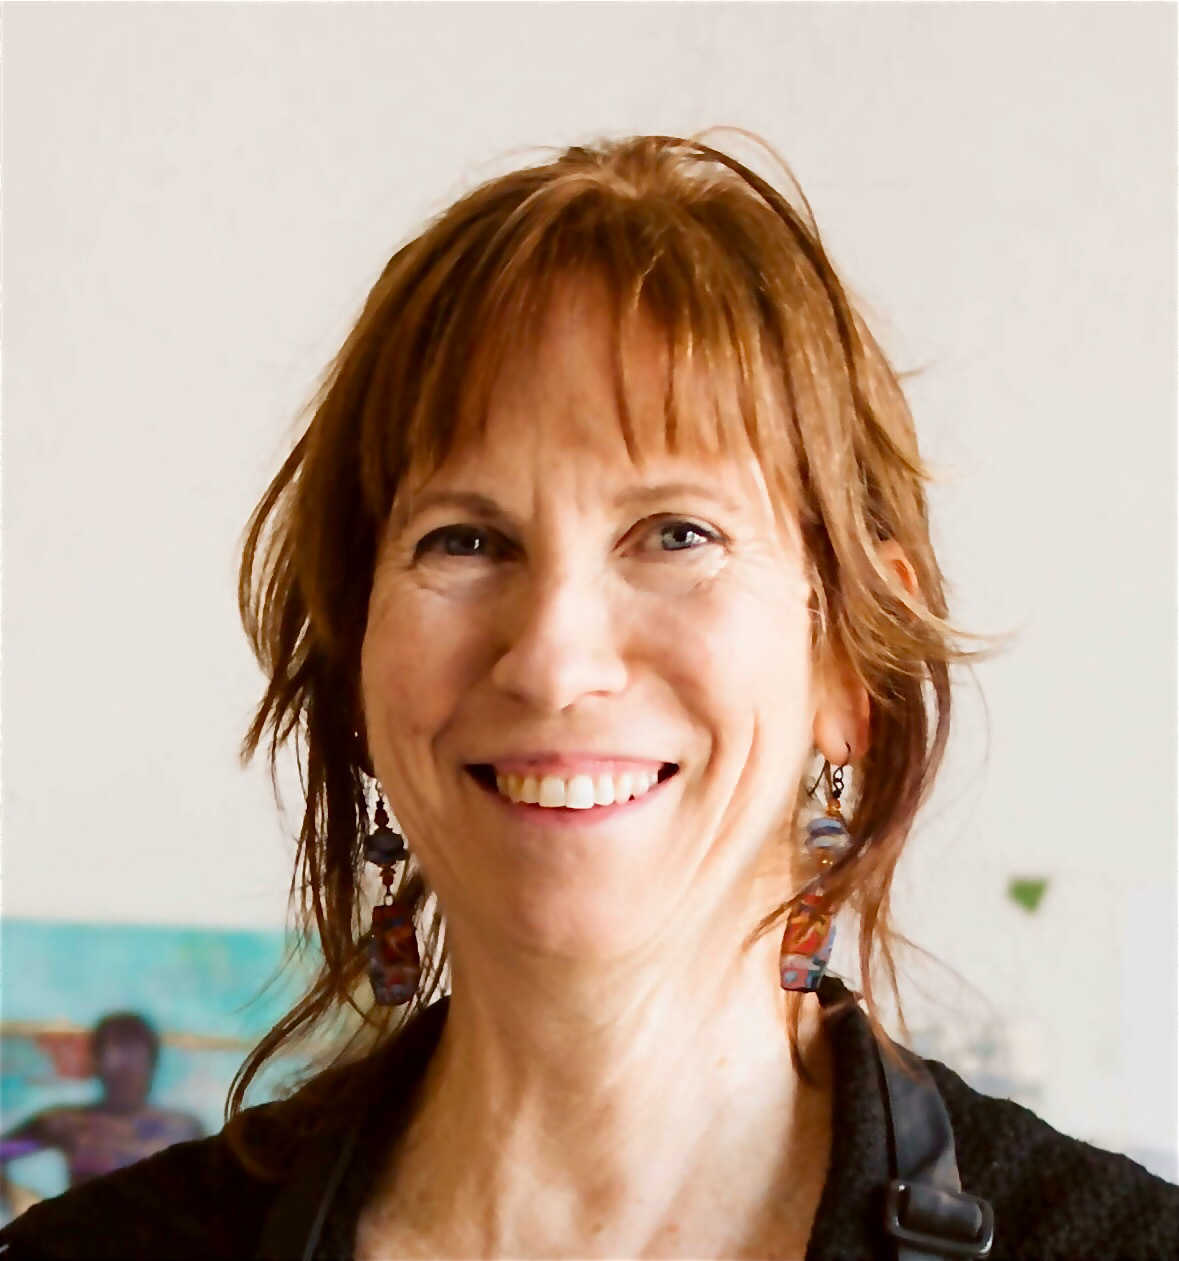
Lana Ballot bio
Lana Ballot is a Signature Member of the Pastel Society of America (PSA). She has exhibited and won awards in National and International juried competitions, including the Pastel Society of America’s annual show ‘Enduring Brilliance’ and the Pastel Journal’s Pastel 100 competition. Lana is a professional artist and pastel painting instructor, living on Long Island, New York. In addition to her local plein air and studio classes, she travels to teach pastel workshops within the USA and internationally. You can see more of her work on her website.
And now, here’s Lana Ballot!
~~~~~
I’m always looking forward to reading the new articles on Gail’s blog, and was very honored when she asked me to write a guest post about my evening light landscapes.
Trying to capture the late afternoon light was what got me into pastels in the first place. I did take one pastel class before that, just to get the necessary credits to graduate from college, but the class was rather boring. I put my pastels away and continued painting with oils. One winter afternoon, I wanted to quickly capture the colors of turquoise blue and peach sky and snow outside my window and reached for pastels. Setting up and mixing oils would take too long, but pastels were ready instantly. It was a quick and simple study, but it expressed the mood of that evening.

Though previously in the pastel class I had done a couple of more detailed and polished works, it was this ability of pastels to quickly capture the mood and colors of a scene that won me over. Some similarity in handling color in both oils and pastels was a bonus.
The landscape is my main subject. I did a lot of figurative work in college but after graduation, landscape quickly took over everything else. As any landscape artist will agree, the light and colors outdoors are more interesting either in the morning or later in the afternoon and evening hours. Not being an-early-morning-person, I’m usually painting outdoors or getting my reference photos later in the day.
Ocean beach is one of my favorite places to paint, and the sand dunes benefit greatly from warmer more saturated colors in the evening. Besides, longer shadows lend some extra help to creating a better composition, providing some interesting shapes to work with. In large areas of beige sand and brown grass, particularly off season, those shadows are what forms the foundation of a painting and brings more color into it.

Late afternoon or evening at the beach is also the time when noisy crowds are almost gone – to me personally, the beach is about nature, not people. During quiet evening hours in a place where ocean, big sky, and weathered land are meeting together, I like to feel that I am a tiny part of this big beautiful world. This is the time to just be in the moment, let the stress of the day go, being grateful for the day that’s passed and for the one that is coming next.
In spite of the gorgeous display of colors in the sky at the sunset, I am just as much interested in the land and how that light transforms it – from glowing light on the sand, grass, and water, to the last glimmer of colors in the thickening shadows. The tension between warm and cool, bright and neutral colors are particularly interesting at this time of day. I like to paint the warm golden haze enveloping everything just before the colors of the sunset clearly develop, or the calming effects of cool purples growing stronger with fading light, making even ordinary familiar places more mysterious.

A lot of these nuances of the evening light and colors don’t show well in photos. Almost all of my earlier landscapes were painted from life. Working that way helped me develop the eye for color and learn not to trust photos. I continue painting outdoors whenever possible.
Painting a sunset en plein air
It’s particularly important to work from life when painting a sunset, or at least to do some quick color studies. Because the subject of sunset is so emotionally charged and quite often overused, there’s a danger of painting a cliché “pretty picture.” The way to prevent it is to paint one’s own response to a scene, based on close observation.
Here’s what I do to make the most of the limited plein air time at the very end of the day before the light is completely gone. I’ll use my recent plein air study “Chasing Light” as an example.
Understandably, I did not have time to take any progress photos.


- It helps if the place is familiar to me, because there is no time to walk around for too long choosing the best spot. Another option is to come in early enough, before the time you want to paint.
- I get the basic drawing done and simple shapes blocked in, using darker, cleaner and more saturated colors. It will be easier to avoid a chalky look later if these initial colors don’t have white in them.
- Doing wet underpainting is a great way to establish the basic colors of the shapes in a painting, but there’s often not enough time to for that in this situation. It might still be faster to use toned paper. For “Chasing Light,” I used a purple gray sanded paper (Canson Mi-Teintes Touch, Twilight color). It seemed like it would be a good base color for the shadows on the ground, which were growing more and more muted and cool. This let me get away with adding only necessary details in the shadow area and saved a lot of time.
- There’s only enough time to focus on what’s most important to get the essence of the scene. Instead of trying to finish every area of a painting, I put in just enough detail to remind me of the colors later and move on. One of the great benefits of working on site, particularly at sunset, is that there’s just not enough time to overwork the painting.
- And finally, painting sunset en plein air is more like taking notes of the most interesting changes in colors, not creating a snapshot of a scene at any particular moment. As an example, while I was working on “Chasing Light,” the highlights on the grass were changing from white to light yellow to warmer deeper yellow. They all are reflected in my painting. It does not make the scene less real to me, it just gives it more dimension. Later in the studio, I might decide to go with one stage of the sunset or another in separate paintings.

Painting evening light in the studio
The main advantage of working in a studio is that there’s plenty of time to plan out the best composition. A value study is a must before getting to color. With late afternoon or evening light, it’s even easier to get distracted by color, but it’s the strong value structure that creates the effect of light in a painting.

In my recent solo show, one of the collectors asked our gallery assistant to turn off the spotlights on a painting she was interested in. She wanted to make sure that the light, she liked so much in it, was not the effect of the spotlights. Without realizing it, by turning those lights off she did a value test – it was easier for her to see if there was enough contrast and if the shapes in the painting held together when the color was not influencing her perception. She is now enjoying this painting in her home.
Once the values and design are taken care of it’s time to play with color. In the studio, I almost always start with a wet underpainting, usually using UART 400 or even grittier Art Spectrum Supertooth board. The main requirement is that the surface should be able to withstand being wet and should be white or neutral color.
Originally, I started using the underpainting as an easy way to get rid of those annoying (that’s how I felt about them at the time) specks of white paper showing through all around the painting. After seeing how much underpainting color can influence the final color on top of it, I plan the colors I want to show through for a particular effect – to energize the color in a certain area, to create subtle glow, to emphasize a certain mood, etc.


My underpainting colors are usually clean and rich enough so that they don’t look washed out and can still contribute something to the top layers. It’s always easier to make a color less bright than the other way around. On the other hand, if the underpainting is too bright (e.g. neon or fluorescent colors) it makes subsequent color choices very difficult – everything looks too dull comparing to the underpainting. The best choice for me is the color that is saturated enough but not aggressive – it’s a fine line.
Lately, purples and pinks have been my favorites as the base colors. While they are not my magic colors, here are a few reasons why they seem to work well:
- I like using analogous colors in my underpaintings – they play well with each other and don’t get muddy at the borders of the overlapping shapes.
- Since analogous colors have a lot in common they serve as one unifying group of colors throughout the painting. Of course, any analogous colors would have this advantage, not just purples and pinks.
- Purples extend well from rather dark to very light colors. With some colors, like yellows, you can only get very light values, some colors, like ultramarine blue, don’t stain well. I mostly use NuPastels for underpainting, I’m sure, those who use inks or watercolors, have their favorites.
- Purple has nice warm and cool versions.
- And what’s very important for a landscape artist, purple is a great atmospheric color. It also makes a great base color for shadows or greens in a landscape.
Using the temperature contrast in underpainting to establish the areas of light and shadow, helps me with creating a stronger effect of light. That makes the colors glow from underneath. For example, the sky on a clear day would be one area where I almost always use a warmer base color – it’s the second major light source in a landscape, it needs to be luminous. Using the temperature contrast this way is even more effective when painting a glowing evening light.

The shadow areas are particularly interesting and important, they can make up most of the area in an evening scene. I try to notice the variations in color and temperature, the effects of reflected light that bring more interest and life to the shadows. Starting with the base of clean and rather intense colors for the underpainting, I then add layers of darker and midtone (mid value) colors to create neutrals. Using cleaner colors helps create beautiful rich grays and avoids a chalky look. The accents of rich dark colors make the shadows deeper. I don’t use pure black – even the darkest darks have a hint of another color.

Because I see the color of the underpainting as a very important part of the final color, I almost never blend my layers. It happens naturally in the process of layering colors, the top marks end up lightly blending the underlying pigment, but not completely changing or covering it. Of course, there are always exceptions to the rules, and occasionally I do have to lightly push the pigment into the surface to make it smoother, particularly in the area of sky, where too much texture might be distracting.
“Sunset Filigree” – Step-By-Step Progression

A photo is usually only a starting point. That’s true for both composition and color. Very often composition can be improved by moving things a little bit, resizing, reshaping, etc. For my painting, I added some space at the bottom in front of the grasses, made the background dune larger, and connected both areas with a path. Since this place is very familiar to me, I can easily combine different elements of it in one scene. I like using charcoal for my value studies. Changes can be made very easily and I can lift the highlights with a kneaded eraser.

Underpainting
For this scene, it was important to establish the contrast in temperature right away: cool purples for shadows and warm red for sunlit areas. The sky has a warm golden glow closer to the horizon (it does not show well in a photo), so yellow underpainting was going to help with that.

Block in
The very first thing after the underpainting is dry, is to re-establish my design, working with hard pastels, usually NuPastels, Cretacolor and Richeson. These initial layers are not about getting the colors just right, they need to set up the correct values and temperature of the main shapes. The scene is slowly emerging on the surface. Colors will be adjusted later. This whole process reminds me of sculpting something from clay, moving from very general shapes to more specific ones.

Refining and adding details
Now it’s time to refine the colors and shapes. Instead of copying the colors from the photo I’m trying to remember what I saw on location. I also watch if any color combinations, already on the painting surface, speak to me, creating the feeling I’m after in this painting.

Final touches
This stage is the slowest – I’m stepping back and thinking a lot and adding very little. The rewarding part is finally adding highlights and defining harder edges where needed. Just about that time I came up with the title – the lit up grass reminded me of golden wire in a piece of jewelry.

~~~~~
Wow, such beautiful work! Thank you so much Lana for sharing your work and process with us.
Now, we’d love to hear from you. What was your biggest takeaway from Lana’s post? Or which is your favourite painting by Lana Ballot and why? Do let us know your thoughts by leaving a comment below!
Until next time,
~ Gail












48 thoughts on “Lana Ballot – Painting Evening Light”
Lana Ballot’s work is so beautiful! I love her use of color. She has inspired me to try again to paint sunsets!
That’s wonderful to hear Connie!! Let us know how it goes.
Gail, can you tell me the name of the guy that you posted his colorful art work done on black paper? I think he was from France. This was maybe about a year ago. I loved his work but lost his name. Thanks so much.
I think you mean Alain Voinot. Here’s his guest post: https://www.howtopastel.com/2016/12/alain-voinot-landscape-black-paper/
“This whole process reminds me of sculpting something from clay, moving from very general shapes to more specific ones.” Brilliant, that really spoke to me, as I love to sculpt, but feel overwhelmed with starting projects in 2d. I love the underpainting suggestions and love all of her work. Thank you both!
It’s funny how some thought can strike a spark and get you going! Love that you shared this Ann and that Lana’s words and work will help with getting you started on a 2D project. By the way, I think most painters would be paralyzed by the thought of having to work 3D!!
Beautiful paintings and a very inspiring post. I found the information about the underpaintings very helpful. Thank you Lana and Gail!
That’s great to hear Janette. It’s so interesting, isn’t it, to see the underpainting and then the final painting over it, to see how it affects the outcome.
Great demo lesson from Lana!! A ? Did she use alcohol or water for the underpainting?
Thanks Carol. I’ll leave Lana to answer your question.
Carol, I believe I used water in this one. I see that the colors are more blended in the underpainting here. With alcohol, they come out, at least when I do it, more blotchy because the alcohol dries so fast. Not that that matters really, most of it gets covered up anyway.
I lived in Michigan and spent summer vacations on the Great Lakes beaches. These scenes take me way back. Why? The treatment of the fading light on the sand and sea grasses is just brilliantly done. I’ve read it twice and would need 50 more readings to really grasp all of the subtleties of color and shading. This is really rich painting at its best. Many thanks, Lana, for your detailed explanation.
Oh Andrea, yes, I agree, that fading light on the grasses and sand just get me too! Lana’s work has a way of making you feel you’re right there feeling and seeing it all.
Happy to share, Andrea! Glad my work brings back beautiful memories for you.
Thank you for inviting me to do this guest post, Gail! It made me think about the topic more in depth.
And thank you, Lana, for taking the time and effort to write this up. As you see, many readers are very thankful for your sharing!
Thank you Lana and Gail for a lovely blog. Sunset Filagree is my favourite. I love the colours that Lana uses. The last painting just seems to have it all, nice composition, beautiful colours and tones and contrast. The light on the tips of the grasses is the icing on the cake for me. Thank you Lana for sharing your works and step by step process. Your work is wonderful. I’m from Copiague Long Island originally, so I can tell you have got the landscape spot on.
Thanks for your lovely in-depth comment Ed. And I agree, the light on those grasses are the icing!
It’s great to hear from a former Long Islander! Thank you, Ed!
Sorry, I forgot to mention how much I like the Driveway Magic. Magical is how I would describe it. Brilliant colour.
Magical is the perfect word Ed!!
I found the Information that Lana shared about underpainting to be extremely helpful. I learned that I need to use more intense colors for that purpose. I will be experimenting! Lovely work!! Thanks Gail and Lana!
Fantastic Ruth. And yes, go intense!! You can always cover it up if you need to. Look forward to hearing how your experiments go!
I think this is the best guest blog I have read. Her process for getting just the right light or more accurately feeling was presented in a very clear and easy to understand manner. Paying attention to the temperature of the under painting colors and not just the value really resonated with me. My favorites are the teaser at the beginning with the wave coming into shore, and “Grateful”.
Wow, that’s awesome to hear Anne and I know Lana will be pleased to hear that! I agree with all you say. Yes, temperature is so important in the underpainting and can make a huge difference!
And love those paintings you’ve picked too.
That’s a high compliment, thank you, Anne!
I absolutely LOVE her work. I have such trouble seeing temperature in shadows. It seems sometimes the evening sun is causing warm shadows and in some others it causes cool shadows. Any tips on seeing temp in shadows?
Thanks! Great post!
Thanks Heather. And GREAT question. I’ll leave that for Lana to answer.
I loved all the paintings!, especially Grateful, Last Light and Stoney Brook. I have trouble with temperatures too and I will reread this blog again. I love how she did the last one and made changes to the design, colors, etc. It is beautiful. Thank you both for sharing this article.
So glad to hear Lana’s post is helpful Carole!
Regarding her last piece, “Sunset Filigree,” it was wonderful to see how Lana took an ordinary looking reference photo and created something extraordinary from it!
Thank you, Heather! That’s a very good question. While there’s no exact formula, it helps to think about the angles of the surface, the types of light that still reaches it. Obviously, there’s no direct sunlight in the shadow area, but slanted surfaces (like dune slopes) would have a bit less of the cool blue from the sky, and might even have some subtle warm glow caused by the light reflecting from the brightly lit nearby objects. Things like this are very hard to see in photos, unless you know to look for them, and you know if you paint outdoors enough. I hope this helps a little.
It is quite a complete step by step color painting essay. We need time to read it all over but the stunning beauty of lana’s paintings is worth the journey.
You have that right Genevieve!!
Beautiful work and wonderful explanation of techniques. My favorite is “Last Light” – love the composition and feeling of being there. Also liked your explanation Lana of the emotional factor in a painting – an important spark that is often missing and that makes an ordinary painting an extraordinary masterpiece.
June, I agree. When that emotional pull is added to a beautiful painting, the mix is magic!
Thank you, Gail, for your wonderful blog and thank you, Lana, for such an informative and inspiring glimpse into your painting process! Your thoughts on underpaintings and how they influence the layers on top of them are so helpful – and it’s always a treat to see your beautiful work!
Thanks for writing Donna. Love hearing you enjoy the blog.
Like you, I loved seeing Lana’s underpaintings and reading her thoughts about the why and how of doing the.
Thanks Gail for featuring Lana. Well done blog, will save it for future reference, so much useful information on “observing”. I remember seeing Lana’s Best of Show painting, “Until Tomorrow” at the Pastel Painters Society of Cape Cod For Pastels Only show last June. It was even more stunning in person. Lana, you work magic with this “time of day”.
Karole, yes! Lana does work magic with this “time of day”. I can’t wait to see one of her pieces in the real!
Thank you Gail and Lana for this outstanding post. The colors and moods of these pastels are outstanding! Delighted to find another artist to follow and love.
Love hearing that you’ve found another artist to inspire you along the way Diane!!
Thanks Lana for describing your process in detail. You have captured the light wonderfully. I so miss the beaches of LI and you have brought them back to me
I am inspired to keep working on this subject
Love hearing you’ve been inspired Ruth! Look forward to seeing your Long Island paintings!
Thanks so much for this excellent post–just loved it. So much wonderful and inspiring info, so well written, and really helpful. Lana your work is beautiful and I really enjoyed getting a peak into the process, especially the gorgeous realistic light effects on sand in waning light. I’ll be sharing this with my students!
Jeanne thanks for your comment! And I totally agree with all you have said: about Lana’s work and writing and about seeing her process.
Just wow! I just recently discovered How to Pastel and it’s so helpful. I’m relatively new to pastels and I love the way they blend and how beautiful the colors are, but one of my challenges is allowing myself to get really bold with value and color. Seeing how Lana uses these so effectively has definitely helped to see not only how to do this, but how much more exciting the final painting is to the eye. The exaggerated evening light is the perfect example too. Thank you both so much. I can’t wait to play!
Christine, hearing you say you want to “play” is fantastic!! Playing is where we learn without judgment so go to it!
Glad this post by Lana has helped solidify ideas on how value can embolden your use of colour!
Delighted that you have found HowToPastel and that you have found much to help you on your pastel journey.
Nice work. Did you use pastel pencils to get the fine line of the grasses & grass heads?