Take out those dark pastels and get ready to paint the night!! I’m excited to have Chris Ivers as a guest blogger this month. I’ve been in awe of Chris’s night paintings for some time now and featured her work in one of my monthly-roundups. I hoped she’d accept my invitation to be a guest and yay! here she is! By the way, Chris has also included in her post some great step-by-step instructions on how to scale up your photo.
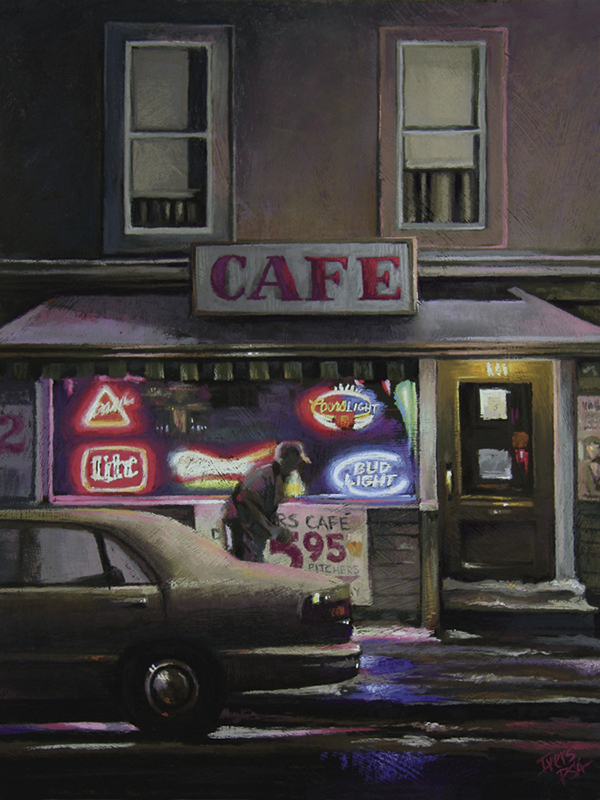
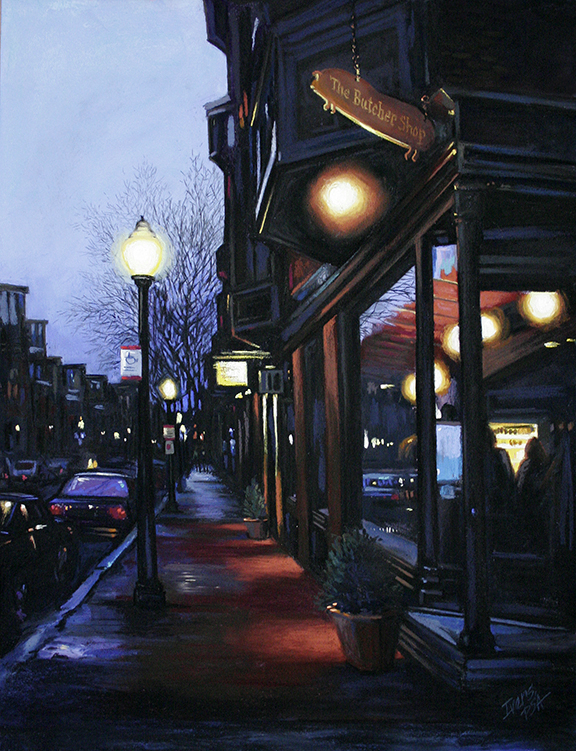
In case you don’t know her work, here are a couple pieces to get your night time juices flowing! (The first I had to include having recently been in Venice for the first time. It brought back memories of wandering about late at night with hardly another soul in sight!)


Chris Ivers Bio
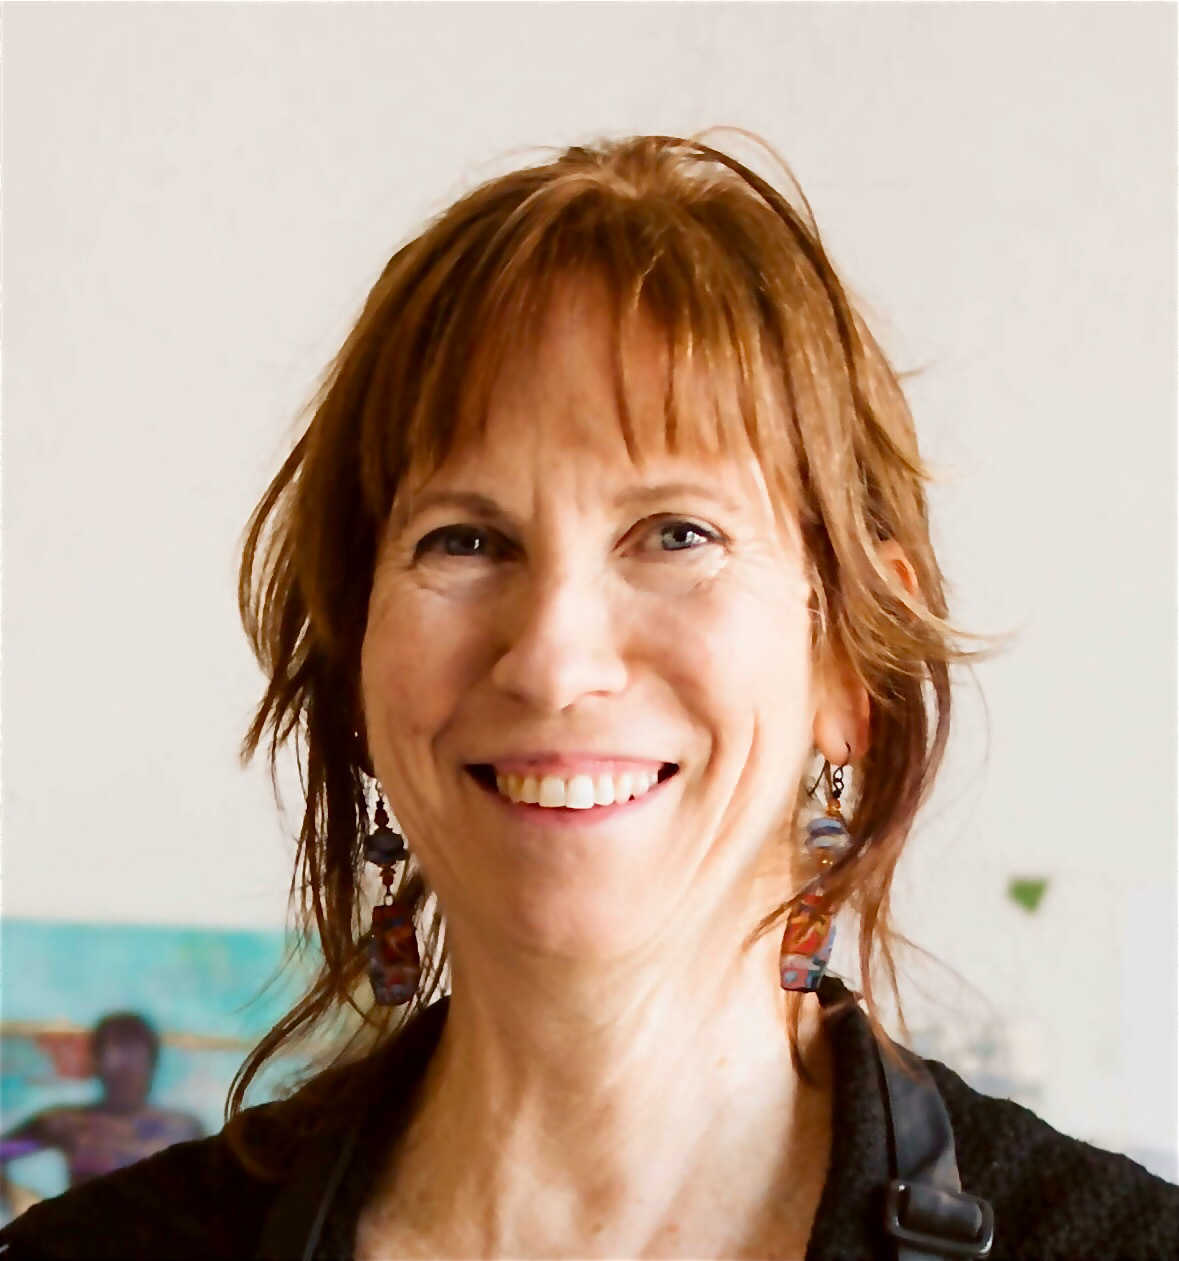
Chris Ivers, PSA-MP, IAPS/MC, is the current Vice President of the International Association of Pastel Societies (IAPS) and a former Board of Governors Member at Pastel Society of America (PSA). She loves to teach and admits to being a pastel junkie who loves to encourage anyone to pick up a stick and try this wonderful medium. Known for her nocturnal paintings (she calls them her “NightScapes”), she makes her own surfaces and enjoys “playing in the dark.” For more about Chris go to her website.
Chris Ivers on Painting the Dark Side in Pastel
I’ve been asked by my friend Gail to write a blog for How To Pastel on how I approach painting complicated nocturnal scenes and why I enjoy “playing in the dark” with my pastels.
First off, let it be known that I am a Pastel Junkie!!! So with that being said I begin this story with my first night painting. To be totally honest with you, it was a complete accident that I fell into one night after having dinner with my family at a local Italian restaurant where one of my daughters waitressed.
It had been raining and I was toting my big SLR camera (I was still working the ad agency so I regularly dragged the thing around) and when we came out of the restaurant it seemed as if everything was gleaming! The street and sidewalks were reflecting streetlamps and headlights and it was an incredible sight. The cars glistened and because the building was yellow it was gorgeous. To add to the fun of the scene I had actually designed the logo and signage for the restaurant! I ran across the street and took cover under an awning to take a few photos of the scene and when I came home it was all I could do to get started painting this “NightScape.”
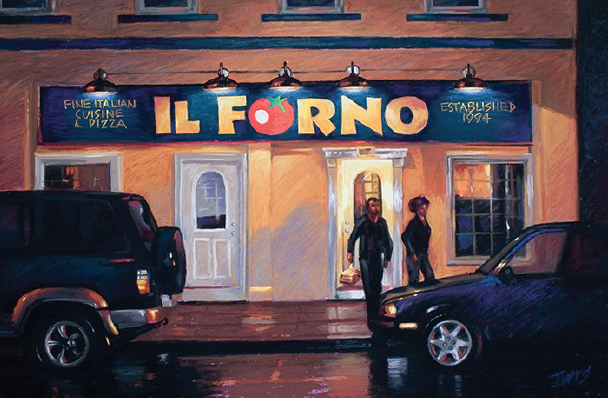
I was pretty pleased with this painting and still have it today to always remind me where I started to get the bug to paint the night. And that started a long line of paintings that to this day still allow me to explore the night with pastels.
Many artists ask me how I can capture such complicated information in a painting and still get the proportions correct from the photo to the paper or panel that I’m working on. (Yes, I work from photos!) So I’m going to bring you through the steps that I use to get to a finished painting starting with a grid that we used to use in my ad agency to make sure the scale of any photo we were enlarging for a sign would be correct.
This scaling method can be used to scale correct proportions up or down depending on what you are working from. This “grid” is simple and can be created in less than two minutes once you learn it and it can be created without measuring a thing! In the videos that I recorded for F+W Media that you can now stream from Artists University Network, I made sure that I didn’t use a marked ruler. Instead, I used a piece of furring strip that I got from a hardware store.
Finding the correct “Live Area” of your painting
So the first thing to do is choose your photo and print it once in color and once in gray scale (black and white). Get yourself a yardstick or any straight edge, a pastel pencil and a Sharpie. In this example, I am working off of an 11 x 8 1/2 inch photo and will be transferring that photo to a 24 x 18 inch prepared black Gator Board. The board has been coated with black gesso pumice that I either make or buy already prepared.
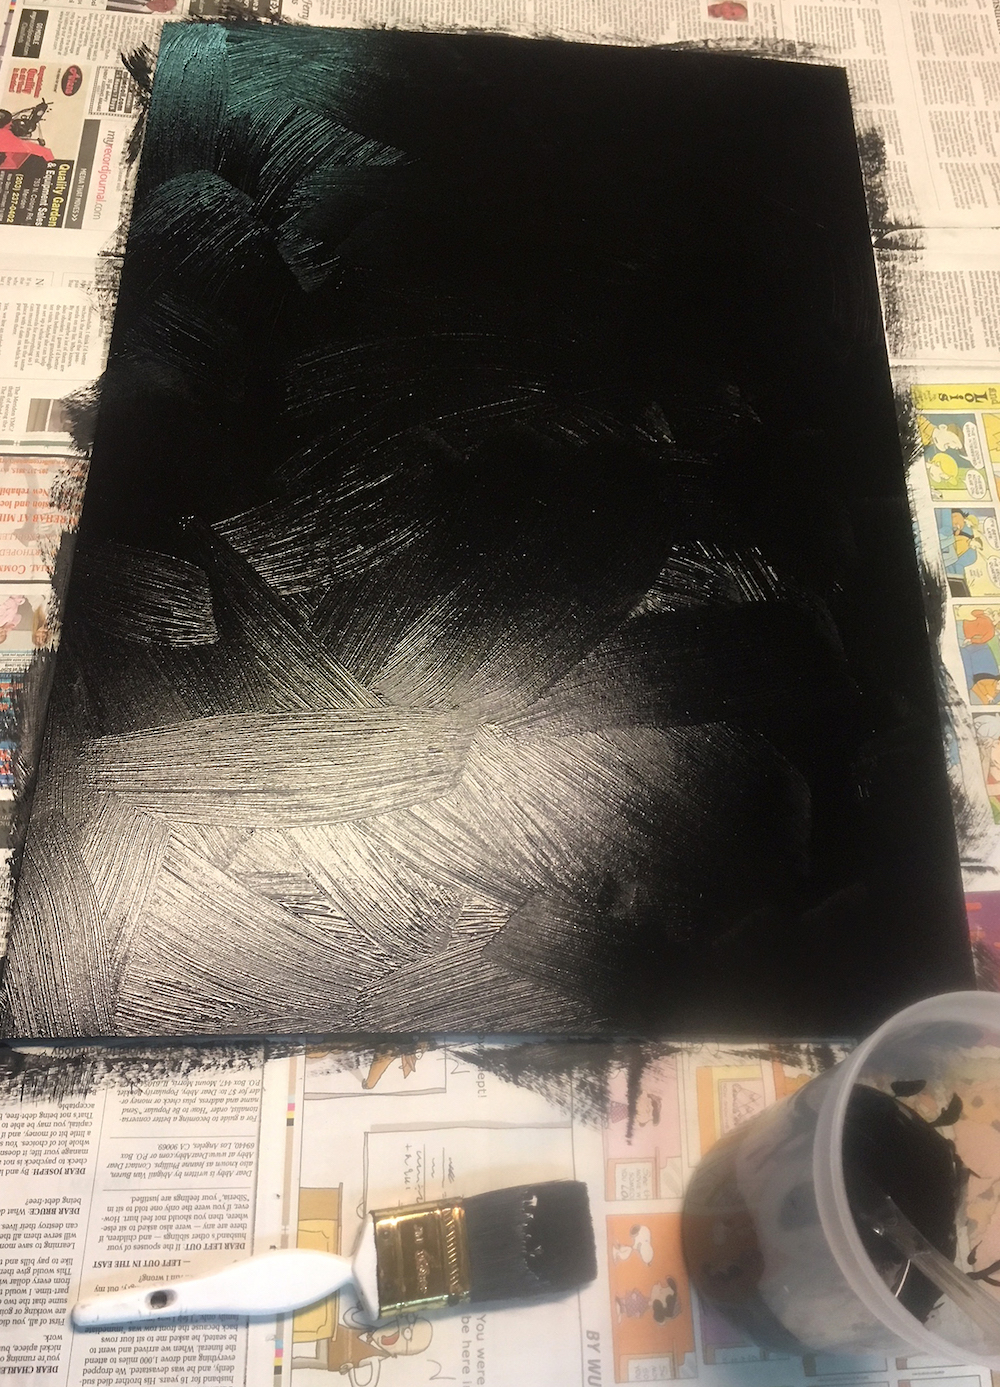
Once the board is dry I start the process of scaling the photo to the board. I place the photo in one corner of the board and lay a yardstick diagonally from one corner of the photo to the opposite corner. I then take a pastel pencil and lightly run it across the board.

As you can see the diagonal line doesn’t quite run to the corner of the board. This tells me that I will have to add to the painting or cut the board. Since I pretty much paint to frame these days I will always opt to add to the painting instead of paying the premium for a custom built frame.
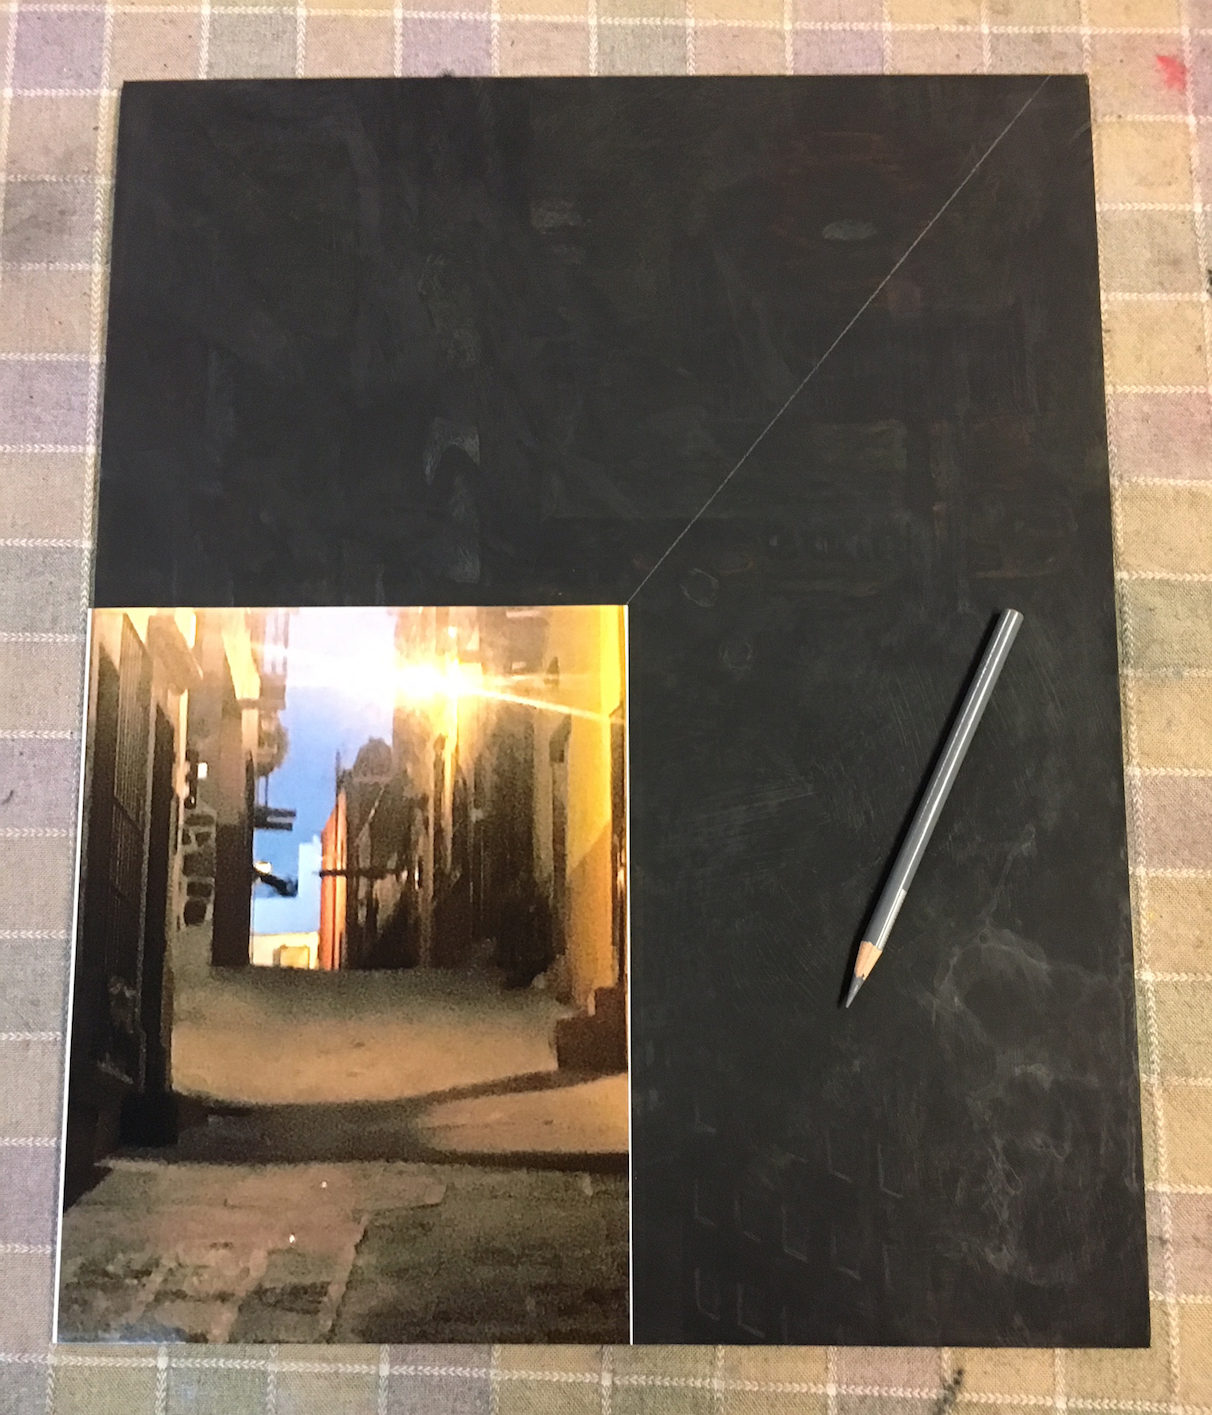
After removing the photo and continuing the line to the opposite corner I then drop a line to indicate the area of the painting that I will have to add to the painting.

Next I draw the other diagonal to complete an “X.” This will be my “Live Area.”

The completed “X” lets me know the correct proportion for the scaling up of the photo.
By laying the ruler or straightedge flush to the bottom of the board I place it right next to the center of the “X” and put a mark on the ruler. I DON’T MEASURE A THING! I simply make a “note” as to the center of that board which means you could conceivably use any size paper or board and find the center without calculating a bunch of numbers.

Then I just use that mark to place a dot somewhere outside of the “X” which gives me a guide to make another line. Since two points make a line I just connect the dot to the center of the “X.”

I repeat this mark making to find the center of the vertical line also just by marking the straightedge with the pastel pencil. I then draw the vertical line.
Next I connect the vertical and horizontal center lines to make a diamond. Again, no measuring necessary!

Next I connect the center “dots” of each of the small “X’s” to complete the grid system I use.

Since I work on prepared Gator Board I can easily flip the board to the smooth side and mimic the grid system by using the same steps on the photo I plan to paint. I mark the grid on both the black and white photo and the color photo. What I might not be able to see on one I usually can pick up from the other.

Note that I have two black and white versions of this photo. That’s because I wanted to see as much detail as possible to recreate the scene and the first black and white seemed too dark. This is easily done with any photo-editing program and can save you a lot of angst while drawing.
I use a pointed black Sharpie to draw the grid on both photos. This allows me to see better than anything when it comes to picking up detail.

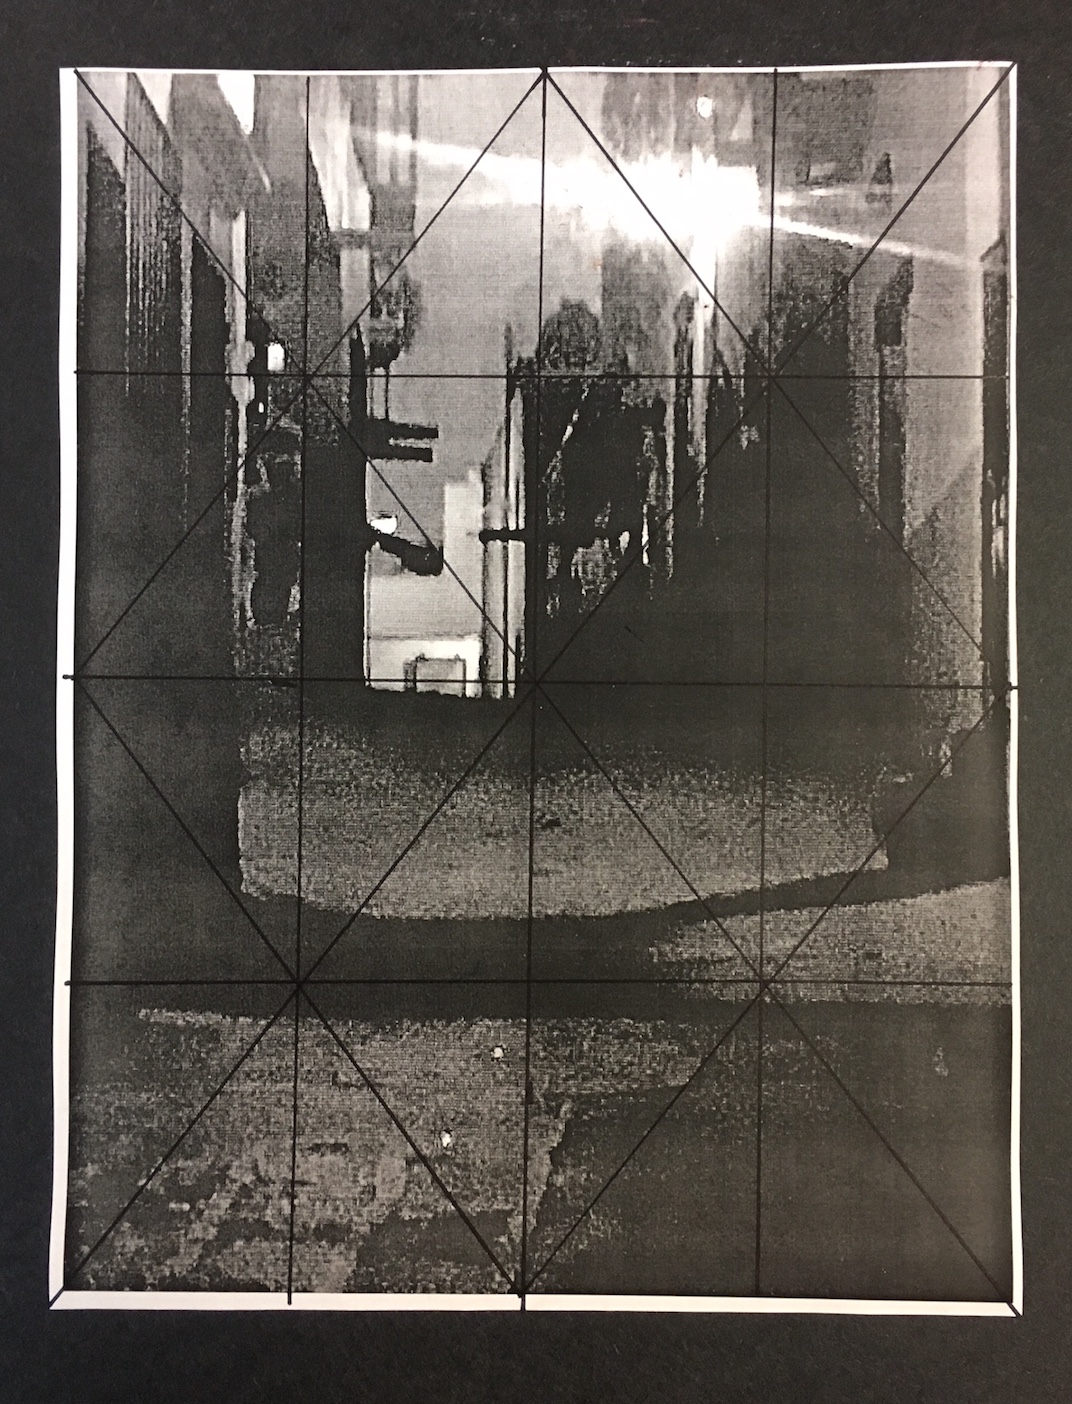
Now I am ready to transfer the drawing using the grids as my guide. This is a complicated perspective so following the grid in this case will help in a big way.
Here is the completed drawing. In some cases I use a different color pastel pencil so as not to be confused by the grid. If I make a mistake I will also use a different color pencil to correct the issue and to make sure I am aware of the drawing mistake.
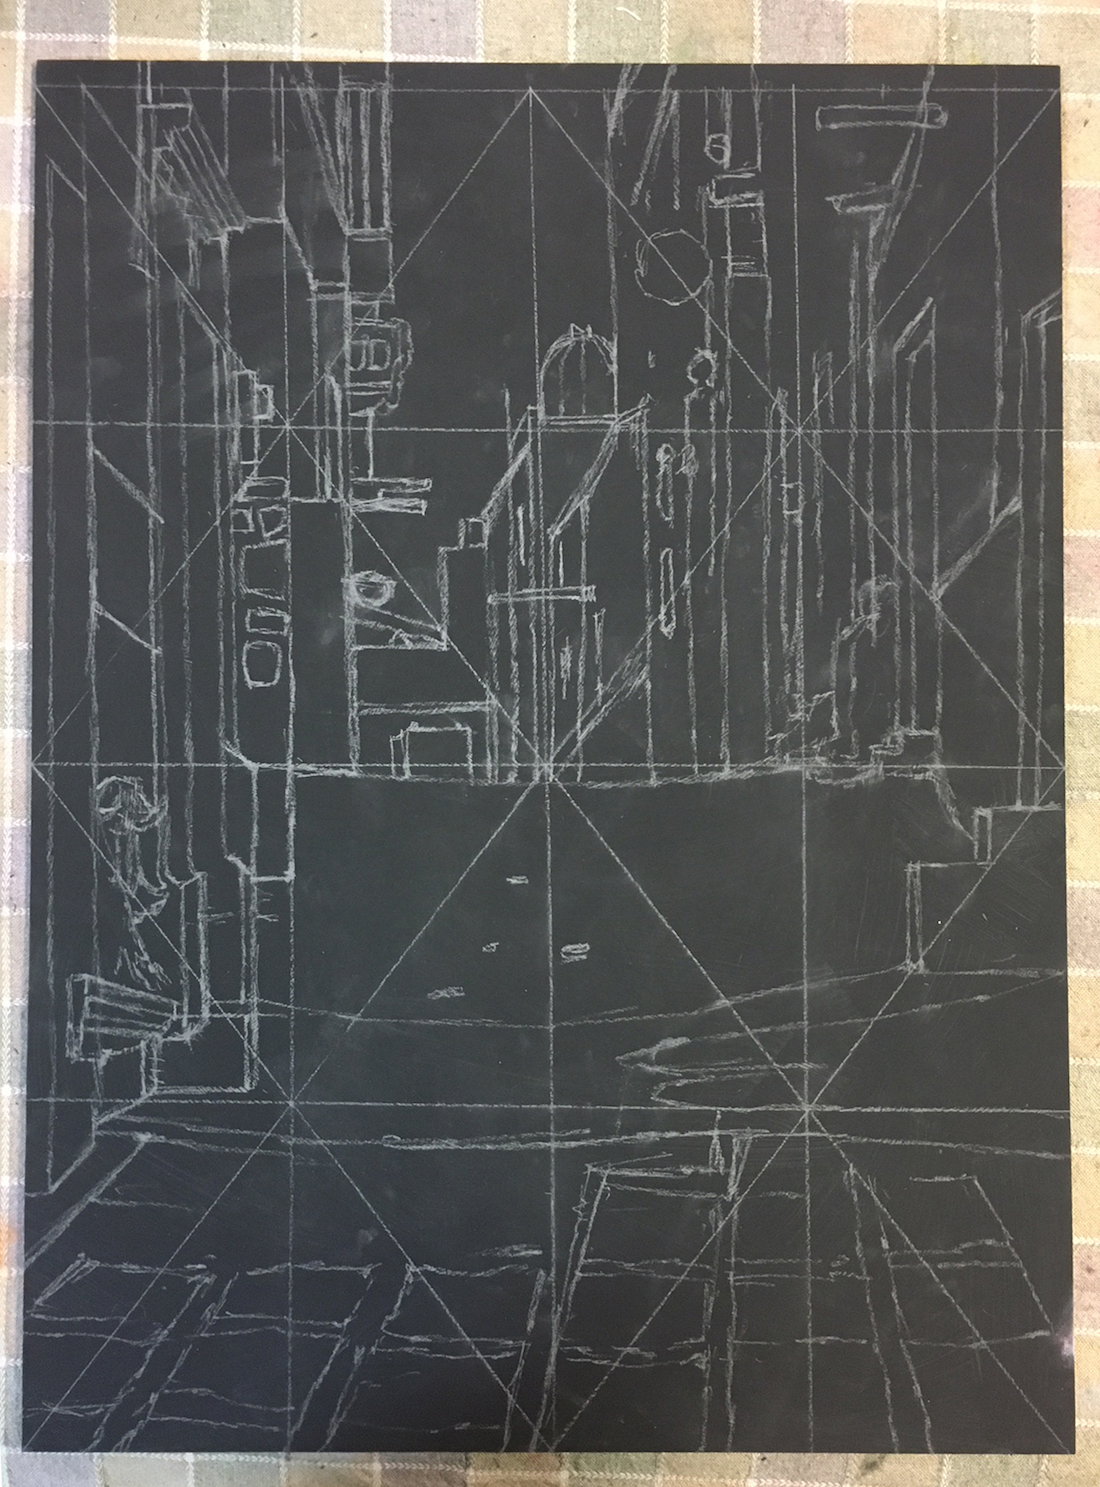
Now I’m ready to paint!
I usually make a point of placing all of the high key colors in first. From the street lamps and reflections to windows that might be picking up light from various sources, I lay in all the bright light colors first. This is because it is easier to keep them bright from the beginning on any surface that I work on than to try to capture that vibrancy after the fact. Many times I start my work from the top with a lighter night sky or lamps so that the lighter pigments won’t drift over the darker pigment that is usually closer to the foreground.
Using an array of pastels by many different manufacturers I have never been one to worry about whether I am using a hard stick for my foundation or using a soft stick as my final layer. I always look for the color! Whatever works is what I use. I love to leave a lot of my crazy texture showing to give the painting a little bit of an edge. And, of course, I’m looking to tell a story in the dark. At this point you can still see some of the drawing peaking through the layers I have added.
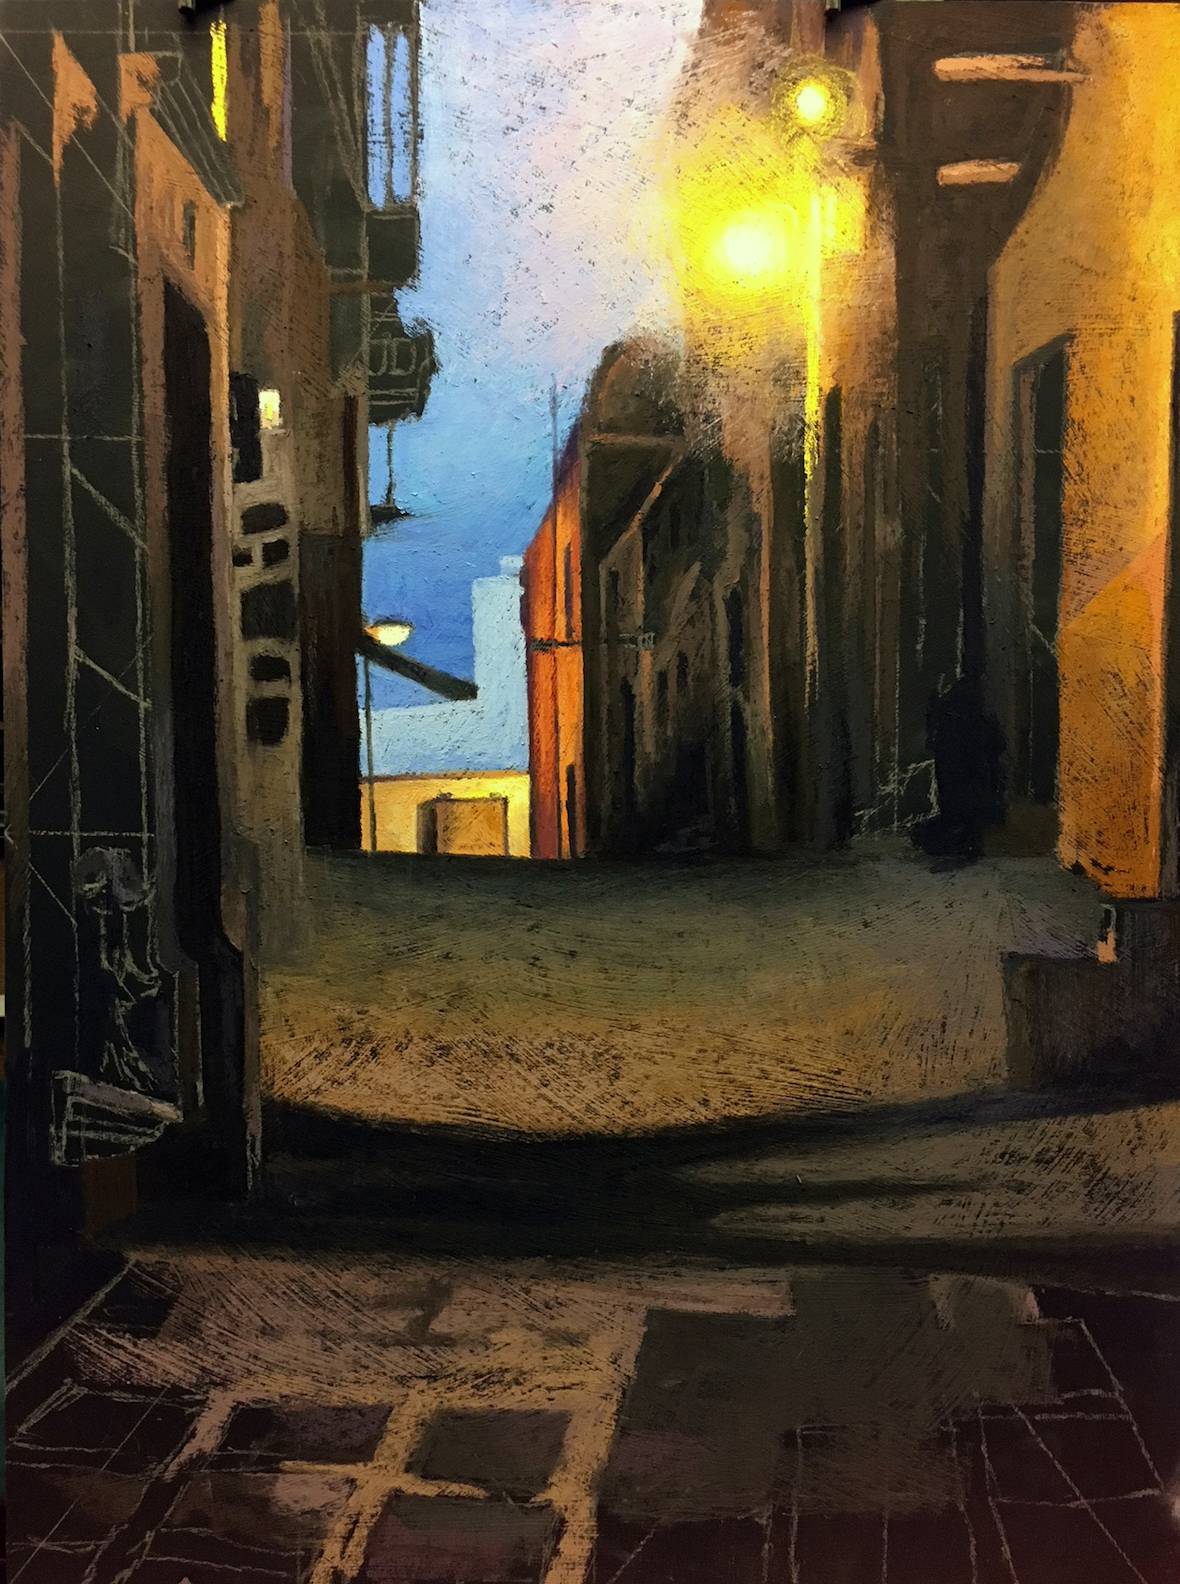

Color Temperature
After blocking in large masses of flat color I can start to blend the cools and warms that will give depth to the painting. As a teacher, I have always found explaining color temperature to be the most difficult to get across to new painters and even those who have worked for years with this medium or others. The difficulty results from the fact that while one color looks cool next to another, in a different setting that cool color could look warm next to pigment that is actually cooler. Called simultaneous contrast, it is the relativity of any one color situated next to another and how it changes its behavior. Understanding color temperature is as important as having a good drawing to start with. It can push and pull locations in any painting and it allows us, as illusionists, to make a two-dimensional surface seem three-dimensional to our viewers. I love playing with the warms and cools within the same value range in order to make the larger blocked in areas vibrate.
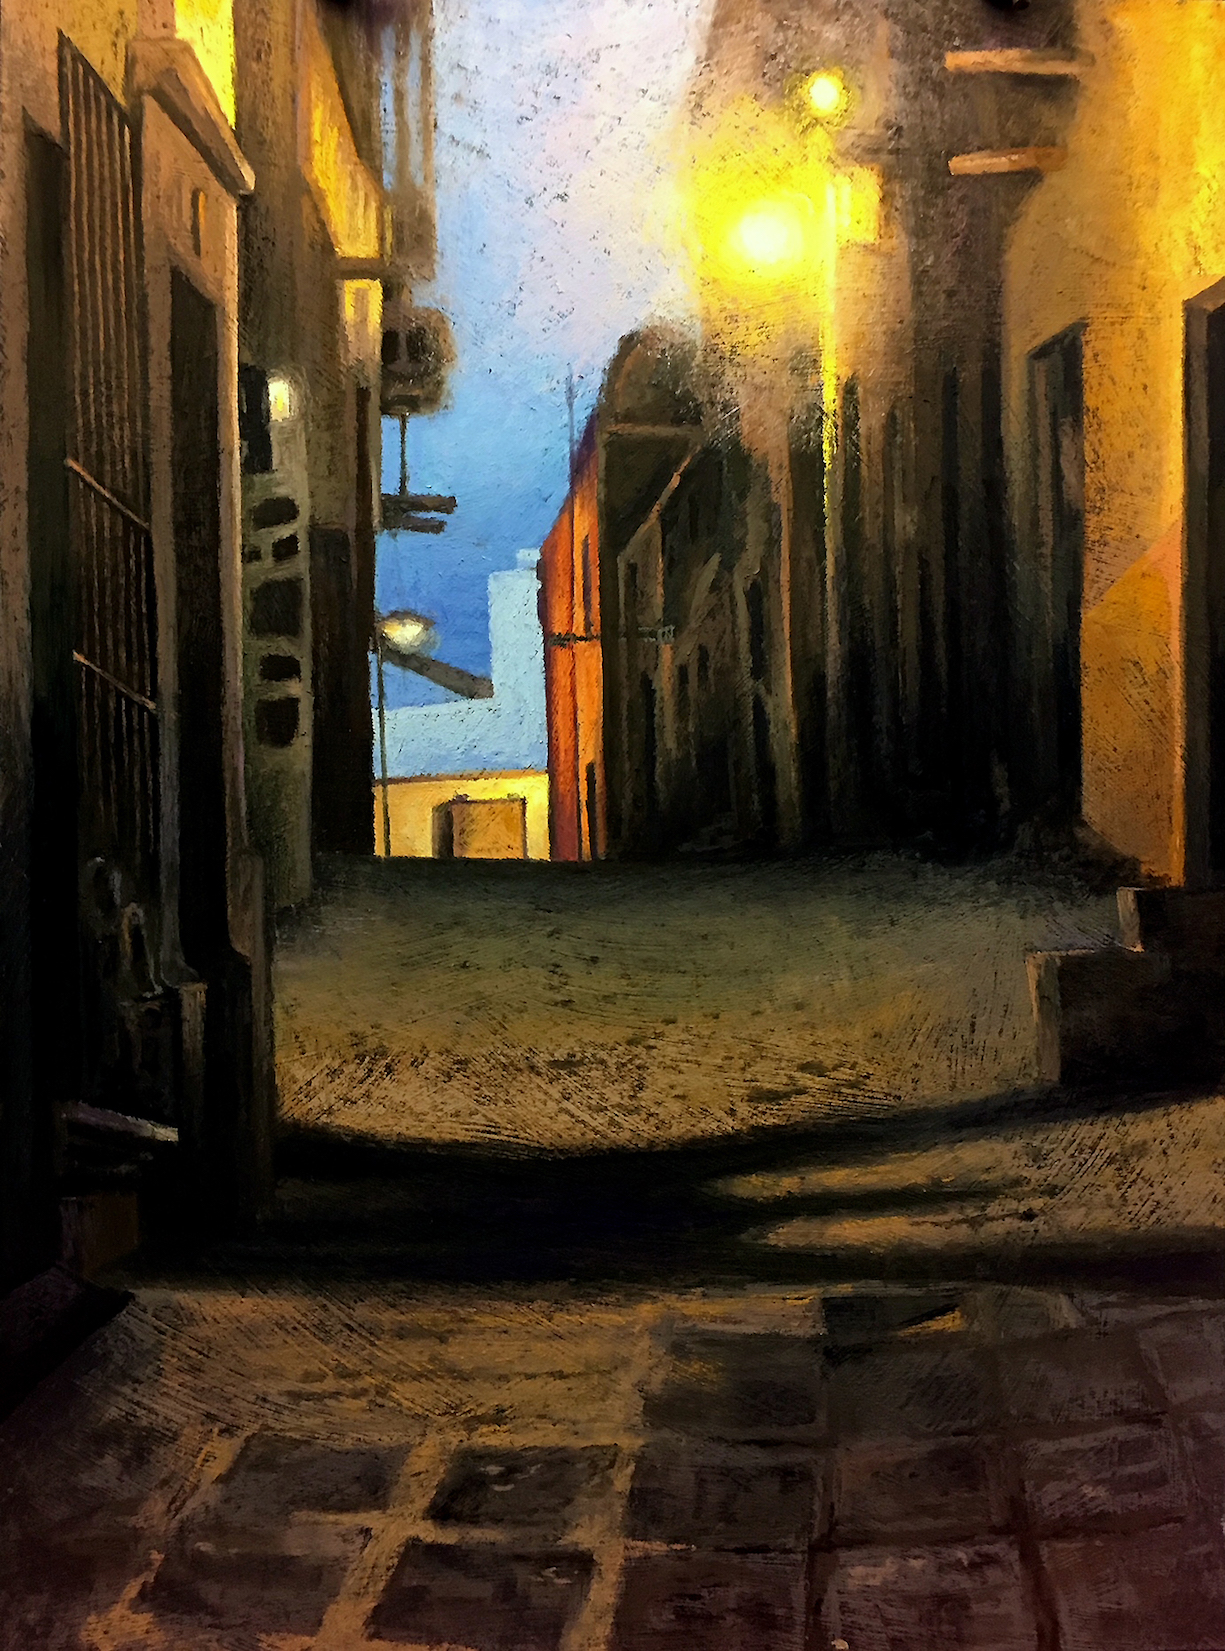
I am often asked if I use fixative on my work. I never use it!!! I destroyed a commissioned portrait early on when the fixative darkened every color on the piece. I was under deadline and I had to do the whole thing over from scratch. I wasn’t a happy camper.
Since I work on the stiff surface of Gator Board I have developed a system to keep my paintings from “shedding” pigment. I take my paintings out into my driveway, and while holding them firmly at the edges, bang them on the pavement upside down to release any loose pastel. My driveway is sometimes multicolored, but I never have to worry about the dreaded “drifting” pigment when I frame or when I ship. Then I just pop the ridged board into a frame and voila! Done and ready to go.
So I hope this little blog gives you some insight into how I handle drawing my complicated NightScapes. I want to thank Gail for giving me the opportunity to share some of my ideas and methods.
As always, happy painting!
Chris
*****
Thanks so much Chris for the helpful tips on scaling up your work. So helpful seeing it step by step!! And loved seeing more of your night paintings.
Now we want to know what you think so please leave us a comment!!
Until next time,
~ Gail
PS. Here’s a wee video of Chris Ivers that I recorded at IAPS in 2017.
And if you’d like to see all the other videos I made, they are all gathered here.
27 March 2018 – just came across this video of Chris Ivers preparing gatorboard!









![Pastels on black aper: Gail Sibley, "Untitled [at this point], Mount Vision pastels on Sansfix pastel card, 5 1/2 x 7 3/4 in](https://www.howtopastel.com/wp-content/uploads/2016/04/IMG_9649-2-150x150.jpeg)



37 thoughts on “Chris Ivers on Scaling Up And Painting The Dark Side in Pastel”
Chris is a caring excellent instructor and I would highly recommend taking a class or a workshop with her. There is so much to learn from her and she makes everything so much fun!
Thanks Karen for this wonderful recommendation of Chris Ivers as a teacher. Always good to know!!
Thanks for the kudos Karen!
I do have a question for Ms Ivers. Up to a certain point, we see the extra bit of space on the right of the gatorboard when you do the scaling. Then it looks like it was cut off in Step 9. If the board wasn’t cut, did you re-scale on the board in Step 9? I was a bit confused.
I LOVE the finished piece! It speaks to me emotionally with the colors and the scene. Thank you for sharing, and inspiring me.
Best regards,
Katie Fowle
Well spotted Katie 🙂 I’ll hand your question over to Chris.
Glad Chris’s work struck and inspires you!!
Wow! Great catch Katie! You are correct in noticing this. I originally photographed the first step with a board that was 24″ x 18″ and you’ll notice that the extra “piece” of the painting was to be added to the top of the painting. I got excited about laying it out and realized all too late that I forgot to photograph all the steps that led up to the finished drawing!!! The only other boards I had available were 16″ x 20″ and so I used those to fill in the the missing steps. That resulted in a different scale from the same picture I was using as my reference. I was racing to get the blog to Gail because I had to catch a plane to CA to teach a workshop and seriously didn’t even notice the difference until you just caught it! If you see #12 you will notice that the board I photographed in the beginning steps has the same addition to the painting at the top of the board. I hope that clears up my oversight but now you can actually see the difference that the scale would make with different size standard boards.
I’ve heard of this method of gridding and I’ve always been curious. In order to do a complex city scene like these, I would have to grid my work and this is so interesting to know. I need to know much more about your use of warm and cool colors. There is so much to learn! Many thanks. Your work is inspirational.
Glad you found Chris’s post about gridding helpful Andrea.
Perhaps Chris will elaborate a bit more here about her use of warm and cool colours 🙂
I think color temperature is the most difficult thing for beginning artists to learn. The problem lies in the fact that the temperature of a color is only relative to the color next to it. So a color that seems warm next to one color can shift to being a cool color when it is next to something warmer. The way I try to teach temperature is by taking two sticks of the same value and squinting your eyes really hard. If the values are the same you should not tell the difference of either stick. They would both look exactly the same.,
Then I take those two sticks and make marks right next to each other on a piece of paper. Whichever color jumps out at you will be the warm color. Warm colors precede and cool colors recede. Try this with colors when you are having trouble determining which colors are warm or cool. It will help.
Thanks Chris and Gail for choosing her to be your guest blogger. The tips for sizing up your photo reference and gridding the paper were terrific. If only I could be so disciplined to actually do it! Your results are stunning. Thank you for sharing.
Glad you enjoyed Chris’s post Deb! This method of gridding is certainly helpful with complex scenes so it’s a good technique to know about even if you don’t use it all the time.
You can do it Deb! Once you use it you will find it is incredibly easy and quick to do.
Thank you so much Gail and Chris. What wonderful and informative blog. Thanks for sharing your grid system without measurements and your step by step nightscape.
So glad Chris was willing to share her knowledge with us Gisela. Delighted that you enjoyed it!!
Give it a try Gisela! It’s easy and accurate.
nice!
😀
Great article Gail, thanks so much for thanking the time and effort to post these. Chris did a wonderful job of explaining the process to get the correct perspective, i think this will be especially useful for my urban landscapes. I’m going to try it out.
Thanks again.
You are so welcome Mark. I was delighted that Chris could join us here and share both her knowledge about painting night scenes with the added bonus of explaining her grid system. I hope you’ll come back here and let us know how it works out for you!
Banner idea on the gridding! So much easier than the measured system I learned, and much less time consuming. Excellent tip. I still get into a rather confused state at times with warm and cool. I understand the concept but have a difficult time deciding which a colour is sometimes. Still new with pastels so lots more to learn. Just keep practicing.
Brilliant post Gail, thanks to you and Chris for taking the time to share with us.
Many thanks Gail for your unselfish willing to share and help us all improve and aspire to new levels.
Cheers, Val
Val it’s always good to hear when a post has been helpful and inspiring! I agree about the gridding system. Like you, I learned a more tedious measuring way which was in incredible pain to use! This makes life (yes, life!) soooooooo much easier!!
Regarding cool and warm, see Chris’s excellent explanation above. Really, it’s all relative!!
And yes, as to improvement, just keep painting! And stick around 😀
Gail, you never fail to provide rich and valuable information. And like Chris, I too ‘whack’ my paintings outside on my patio, resulting in some interesting colors.
Lovely to hear Marsha 😀
Yes the whacking thing does help. I think my pavement gets blown about more as little colour seems to remain… 🙁
I love this post. I learned years ago, that a night scene in a movie, the streets are wet, but nothing else is wet. It gives a great reflection that otherwise would be a flat scene. A photographer brought this to my attention. He had an assignment to take pictures of the city in the evening. It was raining. While the other photographers stayed home, he captured the city glistening in the rain. Thanks for the great article. I love your work and will attempt a piece. I’m a pastel junkie and just received my order of Terry Ludwig Dark II.
Thanks for your story Anne. Yes, the city at night with wet streets – who can resist?? Glad you have your TLs ready to give a night scene a try!
Gail, thanks so much for inviting Chris to blog.
Chris, thank you for the fantastic amount of information. The gridding method is one I will try very soon and the information about warm and cool is especially helpful. Love your night scenes! This was truly an inspiration for me!
So happy to hear your delight with Chris’s blog Wendy!! I was so thrilled to have her as a guest blogger and she gave even more than I anticipated and hoped for 😀
Well, everything I wanted to say has already been said. I had the same questions and was happy to be able to read the answers! I am wow’d by Chris’ work and her simple grid method. I did one painting with a measured grid, but I can see how Chris’ grid would provide more clarity on perspective as well. I have one question about the framing. After “whacking,” which I do as well, I think I can assume that Chris puts it behind glass….but I wasn’t sure since it wasn’t mentioned. I would appreciate a little clarification on that. Love those night scenes!!!
Thanks Ruth! I’ll hand your question over to Chris who can perhaps tell us a bit about how she frames her work.
Very helpful post. I am a new pastel artist, and the many visuals were so important in letting me grasp Chris’s directions easily. I also liked her comments about the order in which she applies her pastels. I’ve read lots of other approaches, but hers seems to make the most sense to me. I will borrow her approach next time and try to keep her warm/cool advice at the top of my mind. Thank you both for such good content.
Cheryl I am delighted that you found Chris’s post so useful, both the gridding and her process of applying the pastels! It’s always wonderful when a teacher’s words really reach another’s ears, and head, and heart!
I absolutely loved this. I like her way of gridding the paper and the reference photo….! Also I like her response to the question of color temperature….about ‘squinting’ and the comparing the sticks….then the marks. I have always love her nocturnes and have one of her videos….! My problem sometimes comes from photographing the finished painting…..! Even if I’m satisfied with the painting, It can be very difficult to get a good photo, afterward to post or to submit……would like to know more about that……
Thanks Curtis for such a great comment! And that you found so much in Chris’s post helpful. Colour Temperature is a term thrown about and I agree, it was good to read a practical way to see warms and cools. Really everything is relative be it temperature, intensity of value!
I’ll leave Chris to answer your question about getting a good photo of a nocturne painting.
I have been laboriously measuring squares when drawing larger paintings from small photos and it has been so time consuming. This blog is just what I needed, how did you know? So many good tips. Your blog is my favorite art read in mornings with a good cuppa coffee. Thanks so much.
I hear you Sharon about the time (and energy!) spent gridding up with rectangles. All that dang measuring!! So yeah, I knew it was needed hah hah.
Thank you so much for your kind words about my blog. Love the image of you reading it with a morning cup a joe!
Brilliant! I’m so excited to learn this technique of sizing up. I’ve got a beautiful night shot of a local trattoria that I’ve been dying to paint but didn’t know how. It has lots of darks with red and then the light.
Thank you so much for sharing this technique.
That’s wonderful to hear Christine! Have fun with your trattoria night scene 🙂